ASAPIO Payload Designer
Overview
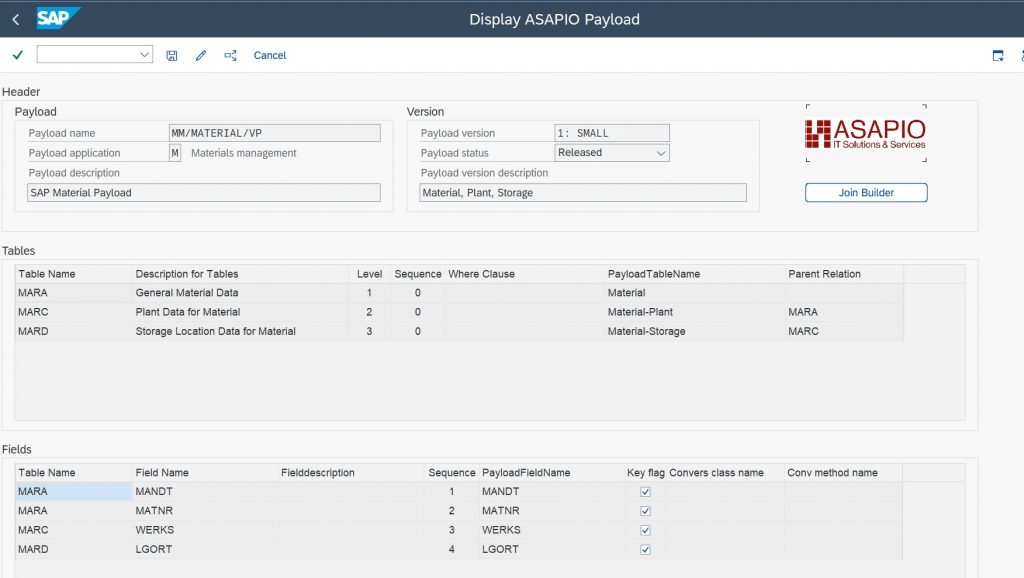
With ASAPIO Payload Designer (transaction /n/ASADEV/DESIGN), you can define the payload of event messages or batch interfaces using a configuration-only interface, without coding. It also comes with a set of pre-delivered ASAPIO payload types and versions, where a version can also mean a different scope of fields or other settings.
Once you designed the payload using ASAPIO Payload Designer, you can use it in outbound interface definitions.
App modes/screens
- The Payload Designer main screen allows you to create, copy, or delete Payload Designer Views, and also enables you to create multiple versions for each Payload Designer View.
- The version screen can be accessed by double-clicking on a specific version on the initial screen. This screen allows you to view and modify the Payload Designer Version.
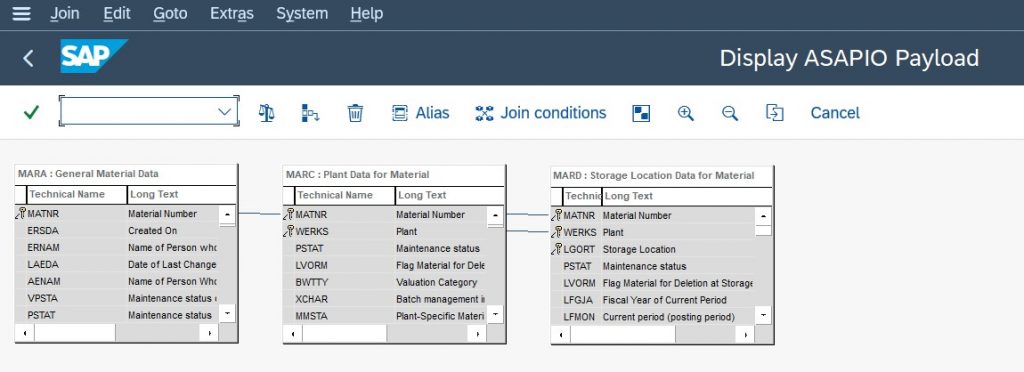
- The join builder screen allows you to add or delete tables and join them with other tables.
HowTo Video
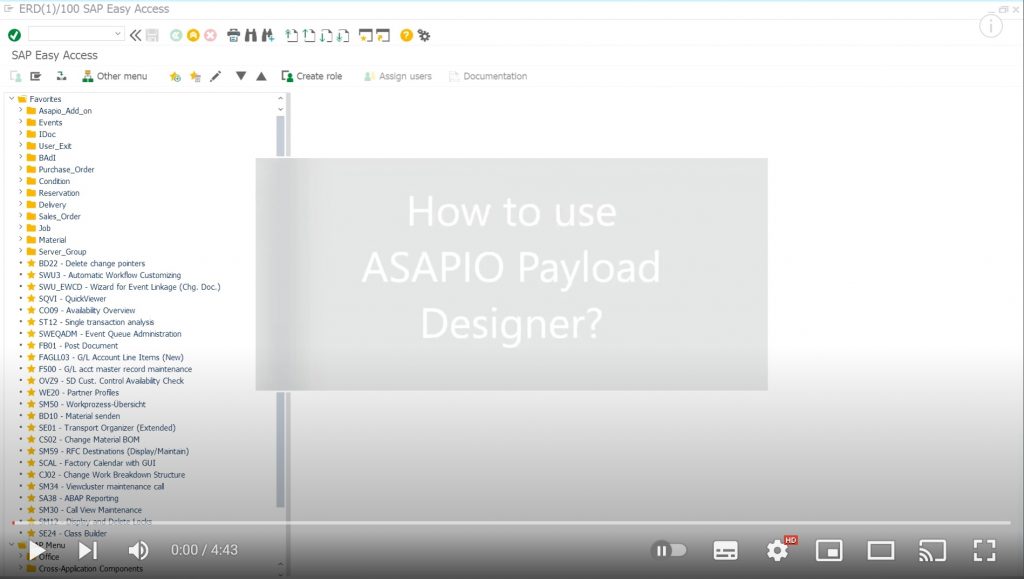
To get a first impression on how to use Payload Designer, please watch this HowTo video [4m44s]
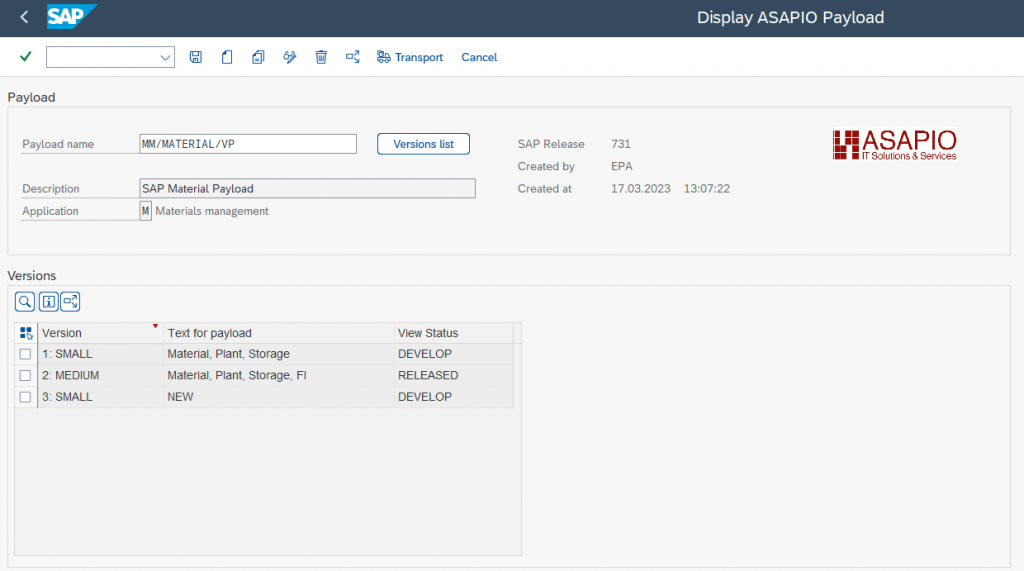
Payload Designer Start Screen
In this screen you can select the different Payload Designs that exist in your system. Each Payload Design has one or more Payload Design Versions.
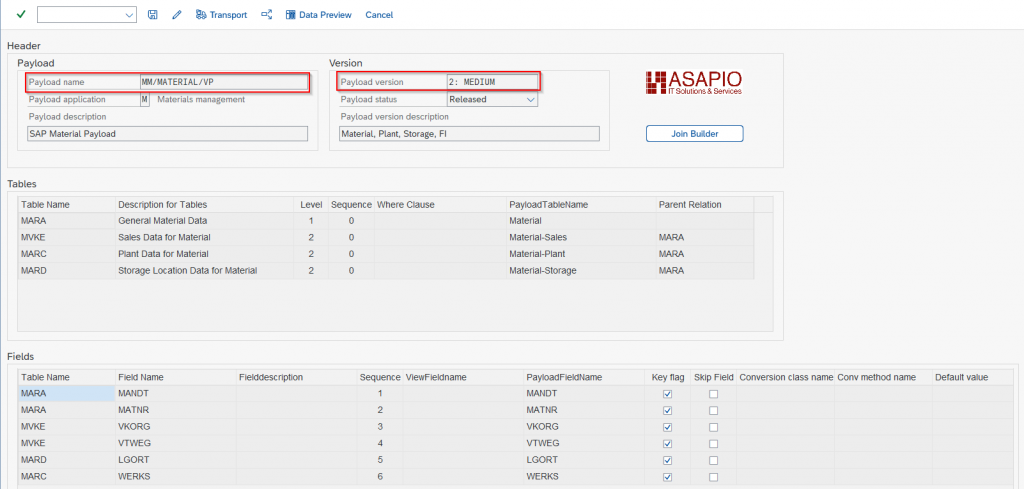
Payload Design Version Screen
Join Builder Screen
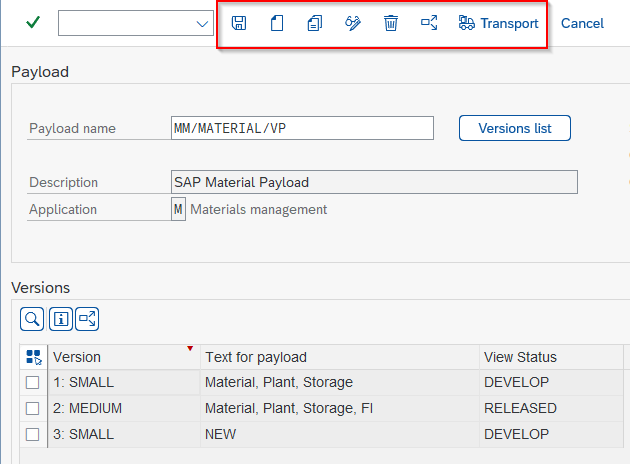
Payload Design actions
There are 7 buttons on the application toolbar:
- Save: Update values.
- Create: Generate a new Payload Design View.
- Copy: Copy a Payload Design View including all it’s versions.
- Display/Edit: Change button will toggle the payload designer between display and edit mode.
- Delete: Removes the current payload and all its versions. A confirmation pop-up will appear.
- Where used: This will find all the available outbound objects using this Payload view.
- Transport: Transport all the tables of the whole Payload View via a workbench request.
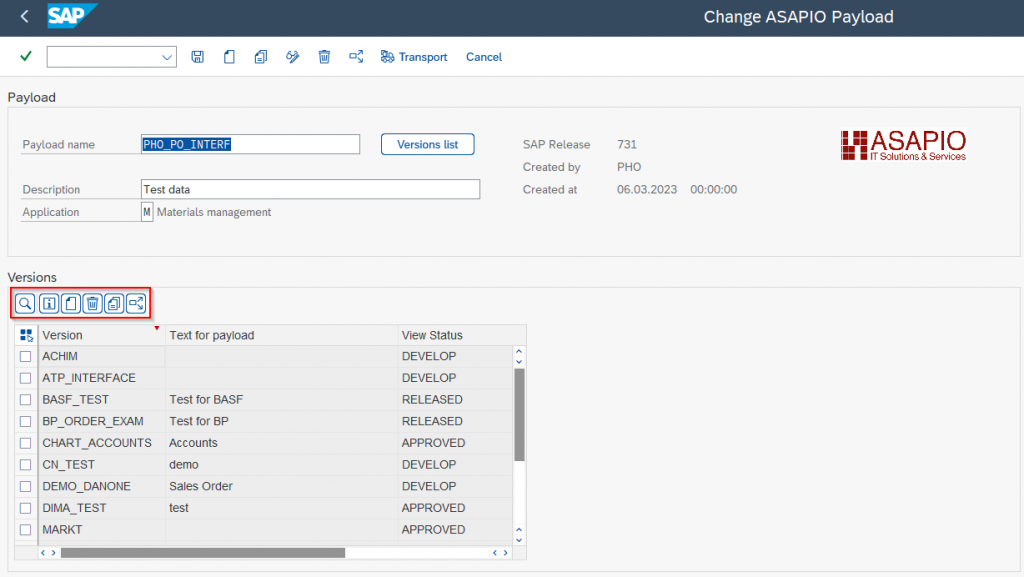
Payload Design Version actions
The main buttons on the versions screen:
- Search: Search for versions.
- Documentation: Display documentation.
- Create Version: Create specific version for the Payload Design.
- Delete Version: Delete the selected version.
- Copy Version: Copy the selected version with all joins to a new version.
- Where used version: This will find all the available outbound objects using this version.
Create Custom Payload through Payload Designer
Steps to create payload:
- Go to transaction /n/ASADEV/DESIGN
- Click Create Payload Design Button on main screen and fill in the appropriate fields
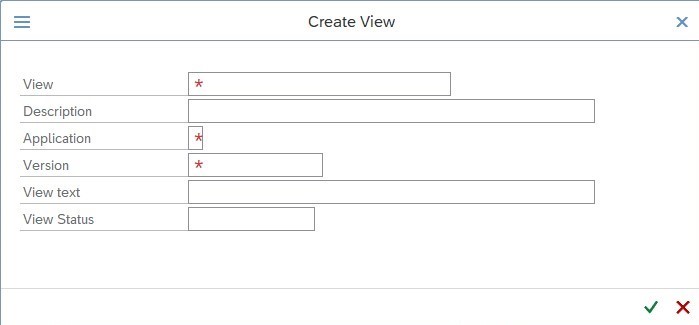
Note: Once it is done it will create the first version of Payload and navigate to the main screen of it.
Push the join builder button to create the first table joins
- Insert new table or custom view
- Adjust table joins through field connections
- Back to main screen
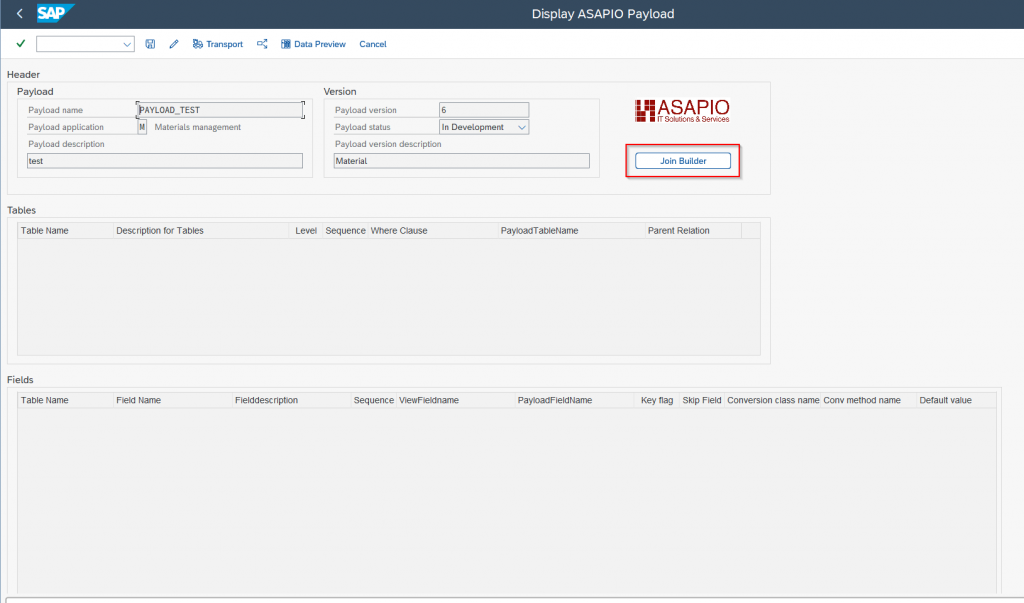
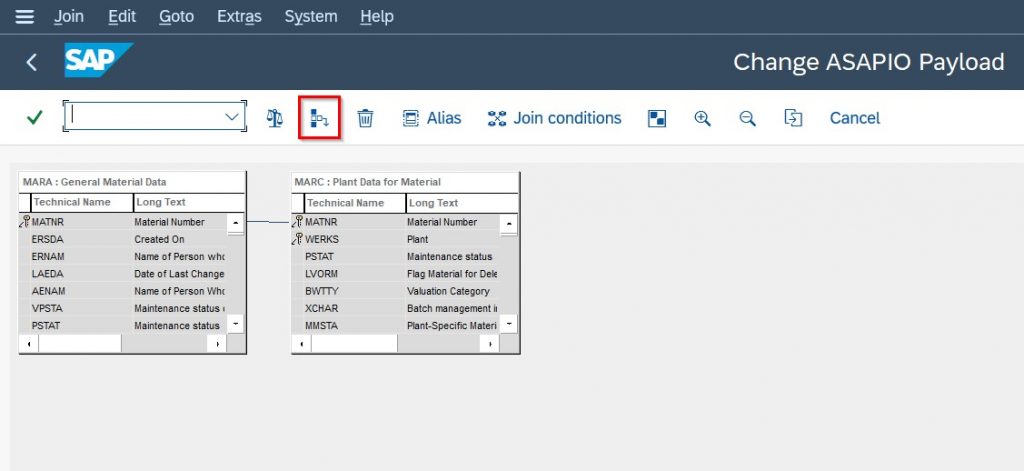
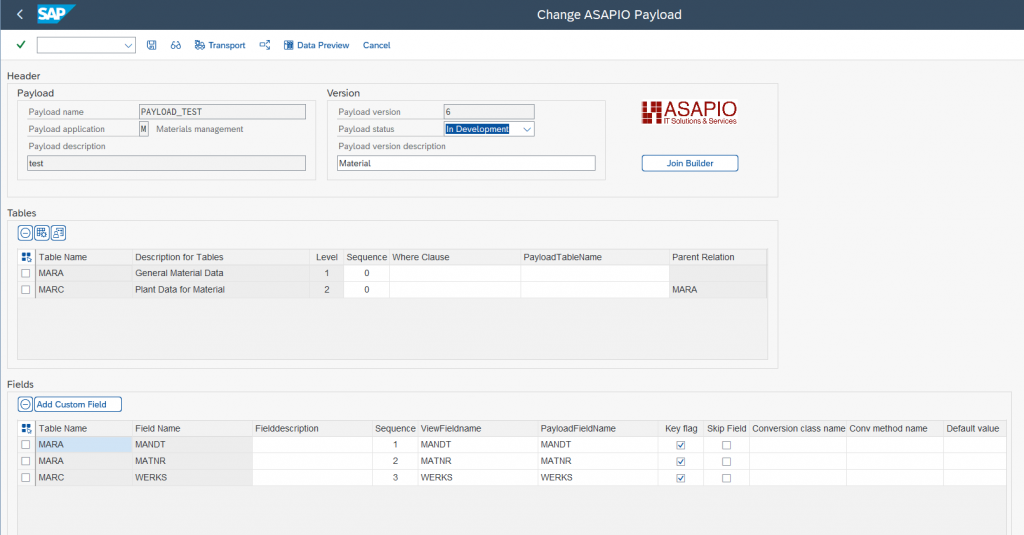
Note: In the Table section of the Payload the parent relationship is automatically determined based on the join conditions of join builder.
Note: In the Field section of the Payload the key fields are automatically determined based on the involved tables and the hierarchical sorting.
Add fields from tables:
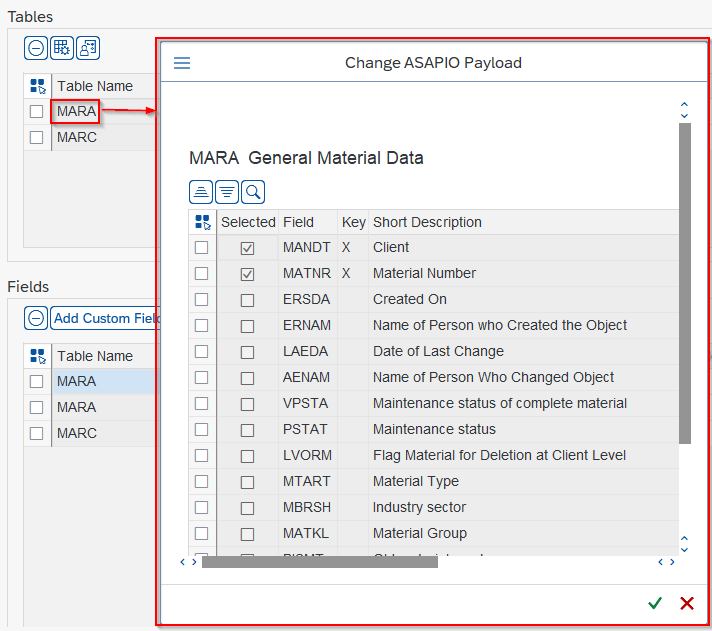
- Double click on a table
- Select one or multiple fields (multiple selection via Ctrl-click)
- Fields can be resorted be specifying sequence number
Add restrictions on status values:
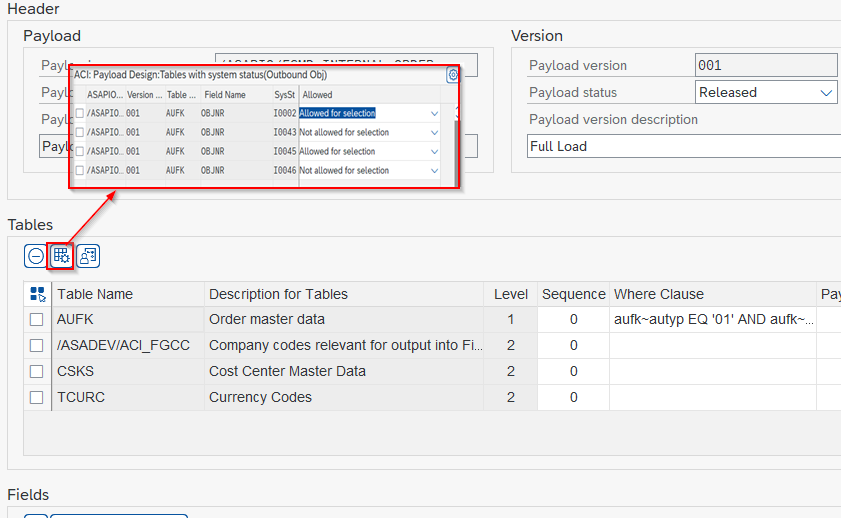
- Maintain system status: maintain system statuses for specific fields.
- Maintain user status: maintain user statuses for specific fields.
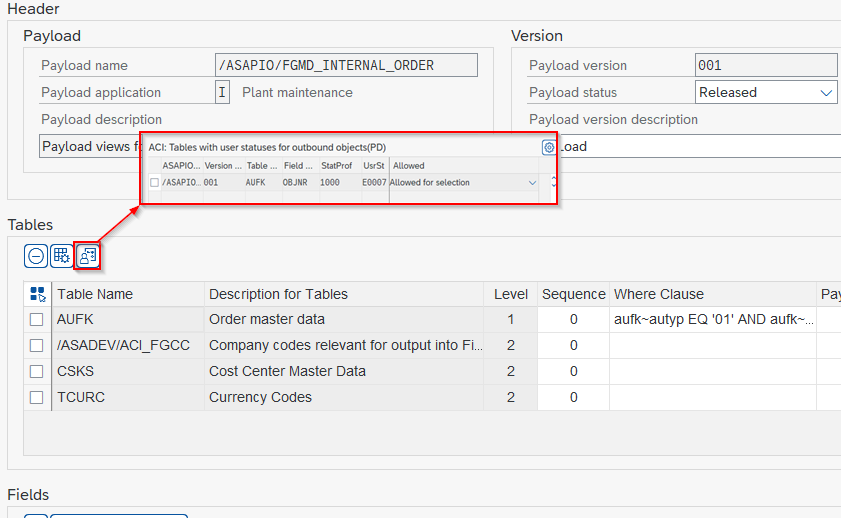
To create a new system or user status restriction click on New Entries and provide the following information:
- Payload Designer Name
- Payload Designer Version
- The table name, where the status is related
- The fieldname, where the status is applied
- The actual status id
- Whether the status is considered or not selection
Note: A maximum of two tables restricted by status are allowed per Design/Version.
Field Section functionalities:
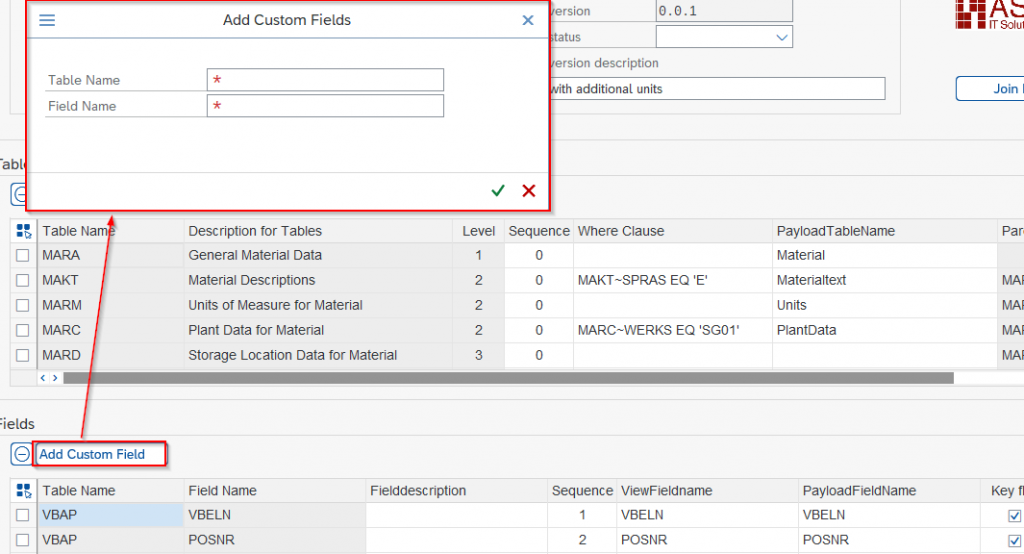
- Add Custom field: Adds a new custom field to one of the selected tables
- Skip field: Check the fields you want to skip when creating the payload

- Conversion class name/Conversion method name: Specify a custom class/method to be called to determine the value for the payload

- Default Value: Put a default value to the specified field

- View Fieldname: A de-duplicated technical name for the fields.
- Payload Fieldname: The name the field gets in the payload.

Table Aliases
In certain scenarios there is the need to join the same table to different tables in your Payload Design, e.g. if the same table has entries for header and item level and you do want to nest the data below header and items.
For this you can include the same table using a different name, i.e. an alias for the table.
Note: this feature is available from version 9.32405 (SP09)
Creating a table alias
- Go in Change mode
- Click Join Builder
- Click Alias Tables
- Create a new alias table (Insert table name and the alias name)
- Click insert button and type the alias table created before
Example VBKD
We have database tables for sales order: VBAK (Header) , VBAP (items) and VBKD (Business data of sales document).
In our payload we need some output fields, including incoterms, which both exist in the header and also in the line items fields. If we only put the header database table (VBKD) then the incoterm fields from the header will not come on the output Payload because VBAP contain not the header but the line items (010 – 040)
- Transaction: VA01
- Insert sales order
- Sales tab (for header)
- Double click on item line
- Billing document tab (for item lines)

To handle this we need to add an alias for VBKD (e.g. ZVBKD_A in this example).
On the main version screen of Payload Designer we have to put a where condition which will limit the data the header.

Here is what the payload will look like for this example:

Data Preview
Preview the extracted data directly in the payload designer as a table or as JSON payload.
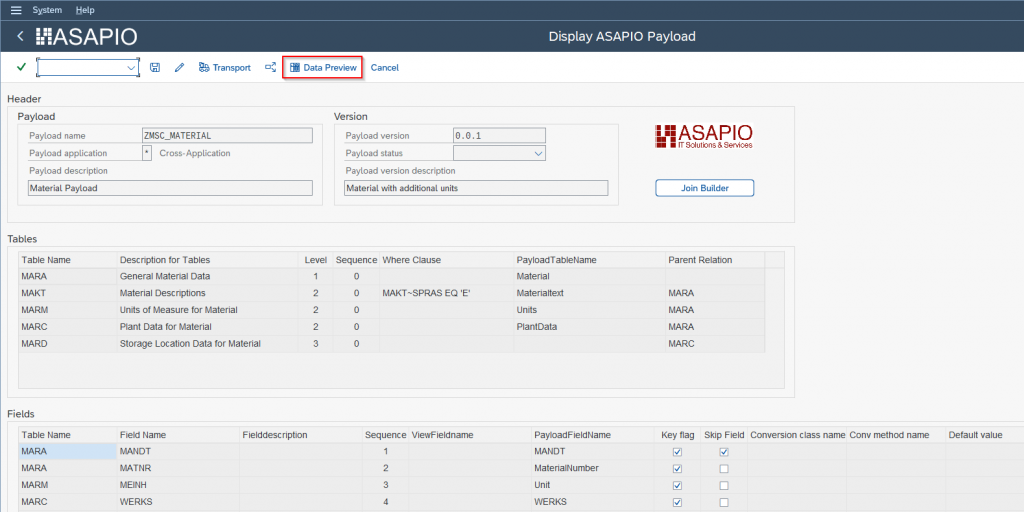
Note: The payload must be used in at least one outbound object.
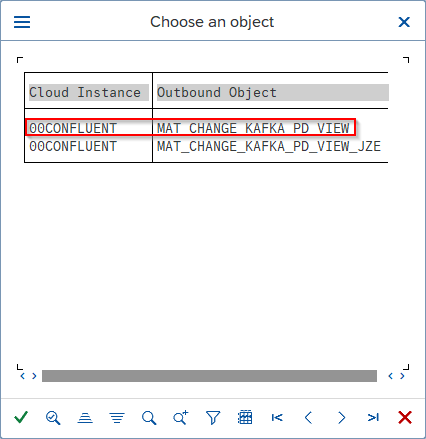
Select an object that has been configured to use the Payload Design:
Select the preview type and a key for which to generate the preview:
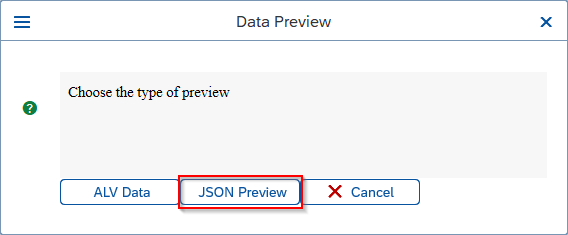
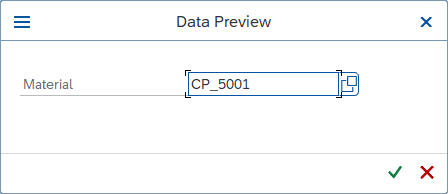
The selected preview type is then opened:
- Table preview:
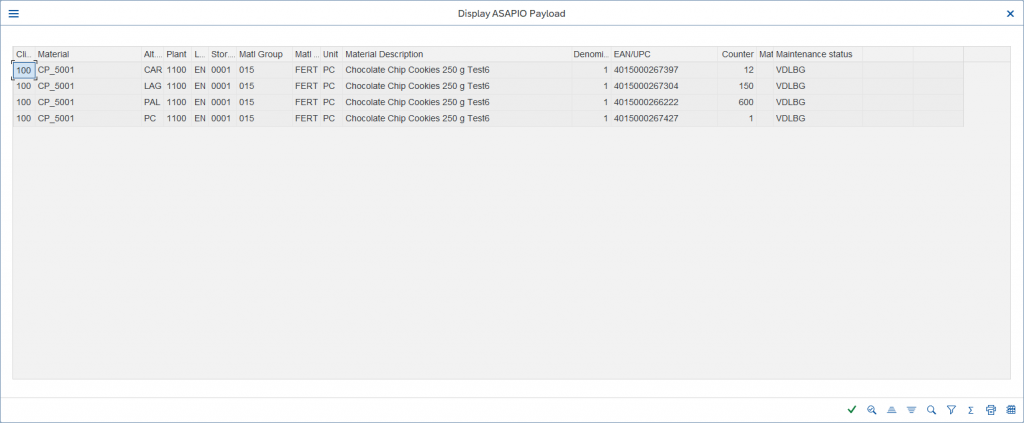
- JSON preview:
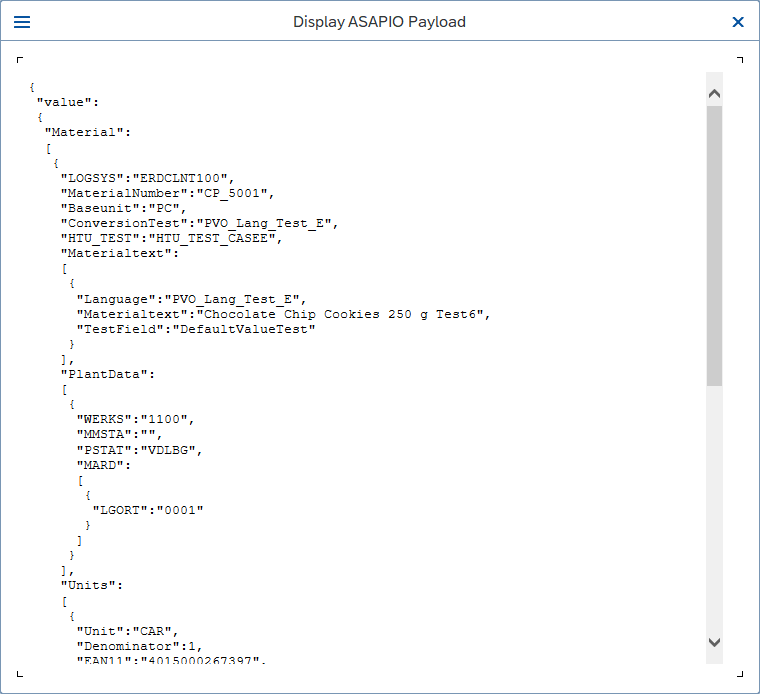
Use a payload in an Outbound interface
Create Outbound Object configuration
- Transaction: SPRO
- Go to IMG > ASAPIO Cloud Integrator – Connection and Replication Object Customizing
- Or go directly to transaction: /ASADEV/68000202
- Select the created Connection
- Go to section Outbound Objects
- Add New Entry and specify:
- Object: name of the outbound configuration
- Extraction Func. Module: /ASADEV/ACI_GEN_PDVIEW_EXTRACT
- Load Type: Incremental Load
- Trace: activate for testing purposes
- Formatting Func.: /ASADEV/ACI_GEN_VIEW_FORM_CB
- Field Payload View Name: Payload Name
- Field Payload View Version: Payload Version

Set up ‘Business Object Event Linkage’
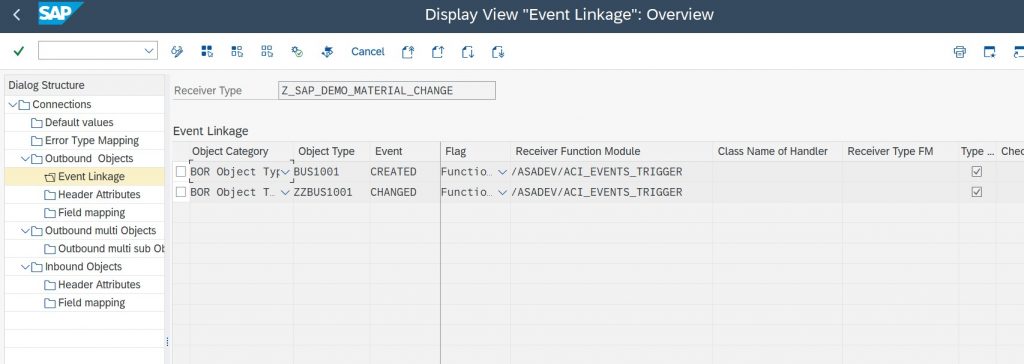
Link the configuration of the outbound object to a Business Object event:
- Transaction: SWE2
- Add New Entry and specify:
- Object Category: BO BOR Object Type
- Object Type: Business Object Type sending the event
- Event: the event to react to
- Receiver Type: the message type of the outbound object (this is the link to the Addon configuration)
- Receiver Call: Function Module
- Receiver Function Module: /ASADEV/ACI_EVENTS_TRIGGER
- Linkage Activated: tick the checkbox
Set-up target endpoint in ‘Header Attributes’
Configure the topic / queue / etc. name to send the events to:
- Go to section Header Attributes
- Add New Entry and specify:
- Header Attribute: name of the attribute according to your connector
- Header Attribute Value: value of the attribute according to your connector
